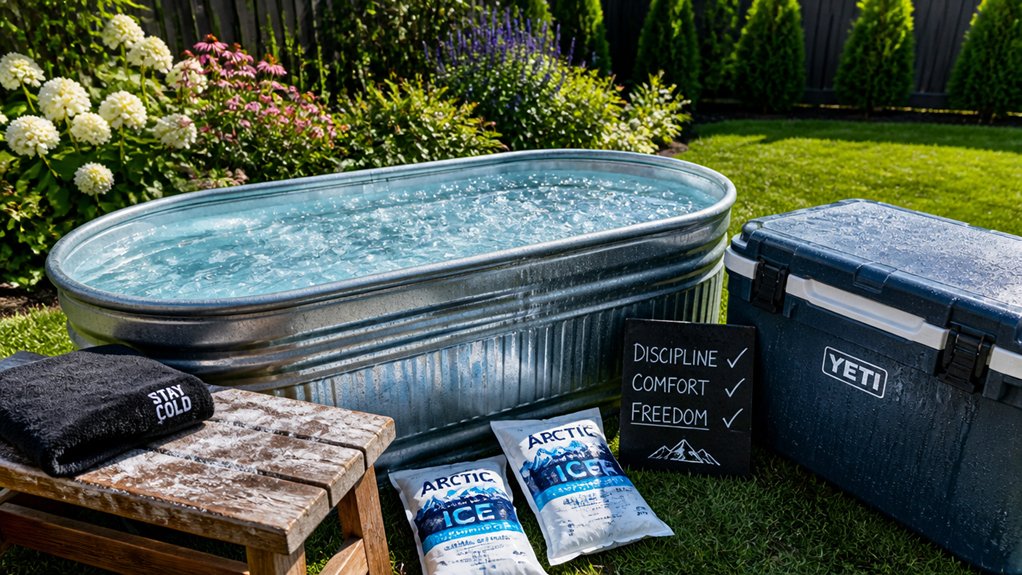
The best DIY ice bath setup involves choosing a durable, well-insulated container like a stock tank or cooler, and adding insulation with reflective foil and foam to keep the water cold longer. Use a reliable pump, water chiller, and sanitation system to maintain water quality, while proper plumbing guarantees no leaks. Think about space and safety features—like GFCI outlets—and consider winter-proofing if outdoors. Keep learning to build a setup that fits your needs and budget.
Why Build Your Own Cold Plunge?
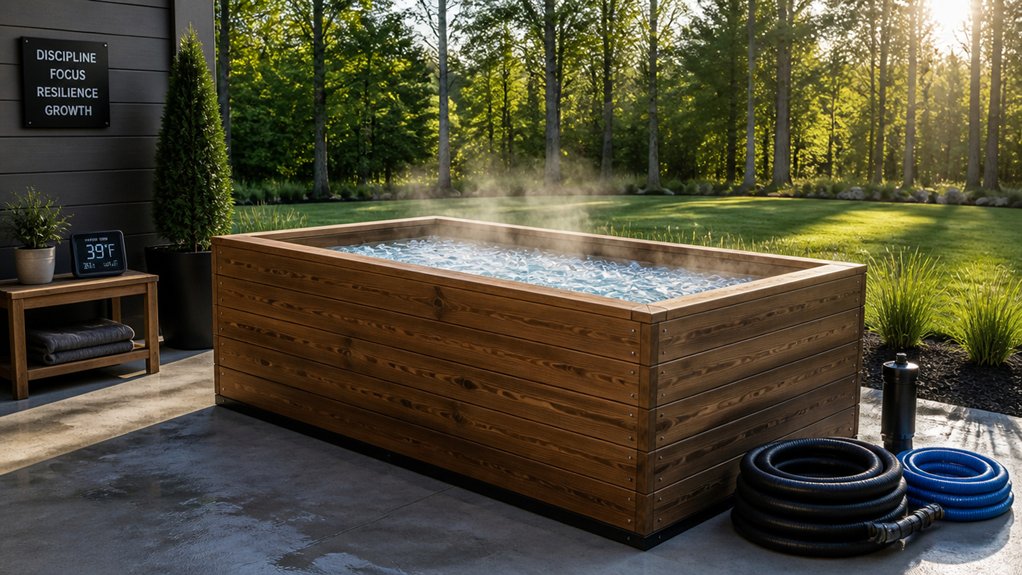
Ever wondered why building your own cold plunge makes sense? A DIY Cold Plunge can save you a lot of money—often under $1,000—compared to pricey commercial units that can cost $2,800 to over $7,000. You get the flexibility to choose the size, materials, and chilling method that fits your space and budget. Incorporating a chest freezer model allows you to select the right capacity and temperature control features for your specific needs. Using a chest freezer as your chilling vessel lets you easily control and monitor the temperature, making sure it’s just right for your therapy routines. Building your own setup also means you can easily maintain and repair it without relying on expensive service calls or replacements.
Plus, designing your plunge allows you to simplify sanitation and filtration, customizing it to your needs for an effective, affordable ice bath experience.
Assess Your Space and Pick the Best Location
Assess your space carefully to find a flat, stable spot that’s near a water source and drainage. Make sure there’s enough room for the tub, ice storage, and easy access for maintenance and entry. Also, consider environmental factors like sunlight, wind, and convenience of electrical outlets to keep your setup safe and comfortable. Proper insulation and material durability are crucial for maintaining water temperature and ensuring long-term use material durability.
Space Availability and Size
Finding the right space for your DIY ice bath is essential for safety, convenience, and effective setup. You need enough space to accommodate your insulate tub comfortably, ensuring it’s large enough for safe entry and maintenance. Measure the area carefully to confirm there’s at least three feet of clearance around all sides for easy access, lid removal, and water refills. Consider your space availability—whether indoors or outdoors—and evaluate the terrain, ensuring the ground can support the tub’s weight when filled with water (over 800 lbs). Additionally, selecting a location with proper insulation will help maintain water temperature and improve energy efficiency during use. Outdoor setups require waterproof ground protection, while indoor locations need moisture management and waterproof flooring. Also, choose a spot near electrical outlets or water sources to simplify connections and minimize hoses or extension cords.
Environmental Conditions and Access
Choosing the right location for your DIY ice bath hinges on understanding the environmental conditions that will keep it safe and functional. Verify the spot has level, stable ground to safely support the weight of a filled bath, which can reach around 100 gallons—about 800 pounds of water plus the tub. Using appropriate insulation materials can help retain cold temperatures and protect your setup from weather fluctuations. Outdoor setups should be shaded or sheltered to minimize heat gain and maintain colder water longer, especially in warm weather. Access to nearby water sources and drainage points is essential for easy filling, cleaning, and water changes; these prevent spills and protect your floors or landscape. If indoors, use waterproof flooring or contain leaks with tarps or basins. Also, make sure electrical outlets for chillers or pumps are GFCI-protected and placed safely, away from water exposure.
How to Choose the Right Container for Your DIY Ice Bath?
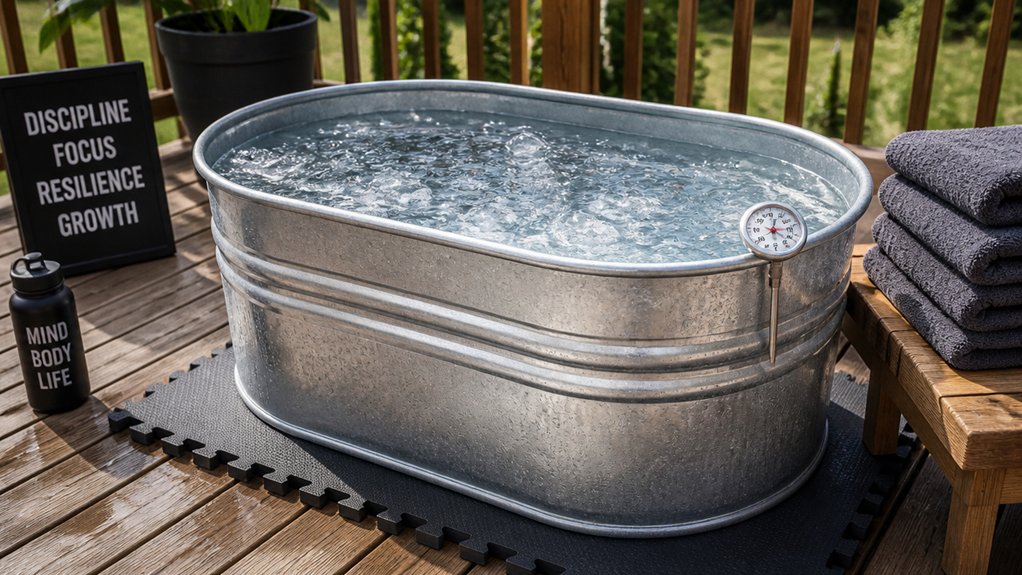
Ever wonder what container works best for your DIY ice bath? When choosing, consider size, insulation, waterproofing, and ease of maintenance. Stock tanks, like Rubbermaid tubs, are durable, weather-resistant, and around 100 gallons, making them ideal for immersion. Insulated coolers, such as Grizzly 400+ quart models, keep water cold longer but are heavier and costlier. Chest freezers can be converted into cold plunges, but require waterproofing and careful temperature control to prevent damage. Here’s a quick comparison:
| Container Type | Benefits | Drawbacks |
|---|---|---|
| Stock tanks | Large, durable, affordable | Limited insulation |
| Insulated coolers | Excellent insulation, long cold retention | Heavy, pricier |
| Chest freezers | Built-in chilling, custom setup | Waterproofing needed, maintenance |
| Inflatable tubs | Portable, inexpensive | Minimal insulation, frequent ice need |
| Ice barrels | Portable, accessible | No insulation, fluctuates temperature |
Additionally, selecting containers with wide-mouth openings can simplify cleaning and water filling.
Gather the Essential Components and Tools You Need
To build your DIY ice bath, you need to gather essential components like a large basin, a water chiller, and a suitable pump.
You’ll also require fittings, tubing, and tools such as a hole saw and drill to assemble everything securely.
Make sure to include sanitization supplies and a temperature controller for safe, consistent results.
For optimal performance and water quality, consider incorporating a filtration system that suits your setup.
Essential Components List
Building an effective DIY ice bath requires gathering the right components and tools to guarantee safety, durability, and functionality. For the basin, choose a durable 100-gallon insulated stock tank, like Rubbermaid, or make certain your well-sealed chest freezer is robust enough to hold cold water.
A reliable water pump, such as a Danner Mag-Drive 1200 GPH, with a suitable filter like the Culligan HF-360B, keeps the water clean and circulating.
An essential part of your setup is a water chiller, typically a 1/4 HP Active Aqua unit, to maintain consistent cold temperatures efficiently.
You’ll also need plumbing components like flexible PVC tubing, bulkhead fittings, hose adapters, clamps, and pipe thread sealant.
Basic tools such as a power drill and hole saw will facilitate assembly and maintenance.
Required Tools and Accessories
Gathering the right tools and accessories guarantees your DIY ice bath functions smoothly and stays leak-free. You’ll need a power drill with a 1-5/8 inch hole saw to make precise holes in your insulated tub. A flathead screwdriver is essential to tighten hose clamps securely. Key accessories include a large insulated tub or cooler, like the Grizzly 400 quart, and a reliable pump such as the Danner Mag-Drive 1200 GPH. A water filter, such as Culligan HF-360B, and a water chiller (Active Aqua 1/4 HP) guarantee peak cooling. Use thread sealant instead of Teflon tape for leak-proof fittings, PVC tubing, hose adapters, and clamps to establish water flow. Optional components like couplings, union connectors, and valves enhance flexibility and ease of maintenance.
| Tool/Accessory | Purpose | Example |
|---|---|---|
| Power drill + hole saw | Drilling cooler walls | 1-5/8 inch hole saw |
| Insulated tub | Main cooling vessel | Grizzly 400 quart |
| Pump | Circulating water | Danner Mag-Drive 1200 GPH |
How to Insulate Your Cold Plunge for Longer Cooling?
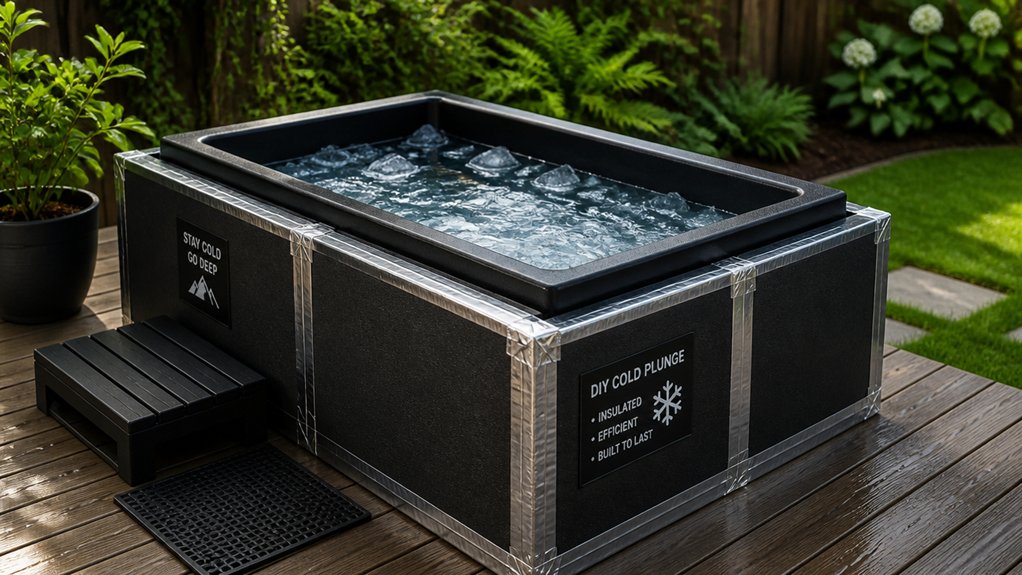
Insulating your cold plunge effectively is essential for maintaining low temperatures and reducing energy costs. Start by choosing a well-insulated container like a stock tank or a large cooler, such as a Grizzly 400+ quart.
Wrap the tub frame with reflective foil insulation to reflect heat and staple foam strips tightly inside all gaps for a better thermal barrier. Use foam insulation for the interior and exterior walls to minimize heat gain.
Wrap the tub frame with reflective foil and fill gaps with foam for optimal insulation and temperature retention.
An insulated lid is vital; craft one with plywood, foam insulation, reflective foil, and a waterproof tarp to cut down on surface heat loss. Incorporating waterproof and debris-resistant covers can further protect against environmental elements and debris intrusion.
Avoid uninsulated metal stock tanks, which require much more cooling energy. Proper sealing and waterproofing of insulation layers guarantee long-lasting performance and temperature retention.
Building and Drilling Your Cooler or Basin Correctly
To guarantee your cooler or basin operates efficiently and doesn’t leak, carefully drill the necessary holes with the right tools and techniques. Use a 1-5/8 inch hole saw to drill through cooler walls about 44 mm thick, and do it in reverse for a clean cut both inside and outside.
Position the outlet hole roughly 9 inches above the cooler bottom, and the inlet about 18 inches up to optimize water flow and pump efficiency. When installing bulkhead fittings, apply generous pipe thread sealant instead of Teflon tape, ensuring leak-proof connections that are easier to disassemble.
Seal the fittings tightly with interior caulk or resin, like JB Weld Water Weld, for permanent waterproofing. Finally, test the assembly with water before attaching tubing, checking for leaks and proper flow. Incorporate proper plumbing fittings to ensure secure connections and long-lasting durability.
How to Connect Your Pump, Filter, and Water Chiller Seamlessly?
Wondering how to connect your pump, filter, and water chiller seamlessly? Start by positioning the inlet bulkhead fitting about 18 inches from the cooler base and the outlet about 9 inches for peak flow. Use 3/4-inch ID PVC vinyl tubing. Secure all barb fittings with two hose clamps to prevent leaks and handle pump pressure effectively. Apply generous pipe thread sealant on threaded connections, including bulkheads, to guarantee leak-proof seals and easy disassembly. Connect the pump outlet directly to the filter, then route the filtered water to the water chiller inlet before returning it to the tub. Perform a static leak test by filling the tub above the outlet hole and running the loop to verify all seals hold tight.
| Connection Part | Function / Placement |
|---|---|
| Pump | Circulates water, connects to filter |
| Filter | Cleans water before chilling |
| Water Chiller | Cools water before returning to tub |
| Bulkhead Fittings | Secure inlet/outlet points |
| PVC Tubing | Transports water between components |
How to Seal Fittings and Keep Your Setup Leak-Free?
Guaranteeing your fittings are properly sealed is essential for a leak-free ice bath setup. Apply generous amounts of pipe thread sealant, brushed on, to all threaded fittings instead of Teflon tape for better leak prevention and easier disassembly.
Carefully drill holes in the cooler with a 1-5/8 inch hole saw in reverse to guarantee clean cuts and prevent water seepage around fittings. Use thick-wall bulkhead fittings with rubber gaskets to create strong, watertight seals between tubing and the tub walls; seal joints with JB Weld Water Weld for added security.
Attach tubing with two hose clamps per connection, tightening only after full assembly to avoid leaks. Conduct a static leak test by filling the tub partially above the outlet to identify and fix leaks before full use.
How to Sanitize Your Cold Plunge to Keep Water Clear and Safe?
Regularly sanitizing your cold plunge is essential to keep the water clear and safe for use. You can sanitize effectively with chlorine hot tub granules—about 3 grams per 100 gallons—or 2-3 ounces of 12% hydrogen peroxide, which helps avoid chemical mixing.
Using a floating chlorine tablet dispenser guarantees a consistent, controlled release of sanitizer over 2-3 weeks, maintaining water quality.
Additionally, a filter system, like a whole house water filter compatible with your pump, removes debris, reduces microbial growth, and keeps the water clean.
Every few weeks, drain your cold plunge, scrub the basin thoroughly to remove biofilm, oils, and grit that sanitizer alone can’t eliminate. These steps keep your water safe, clear, and ready for your next ice bath session.
Installing Temperature Controls for Precise Cooling
Installing precise temperature controls allows you to maintain consistent cold plunge conditions without manual adjustment. A quality temperature controller, like the Inkbird WiFi ITC-308, automates the chiller’s on/off cycling, ensuring your desired water temperature stays steady.
You set temperature cutoffs slightly above the set point (1–2°F higher) to prevent the chiller from running too often, saving energy and reducing wear on the compressor. Positioning the temperature probe inside a protective tube inside the plunge protects it from water ingress while providing accurate readings.
Integrate a master-controlled surge protector to shut off the chiller if the pump stops, avoiding damage. Using on/off valves or cam-and-groove couplings makes system maintenance simple and leak-free during component disconnection.
- Proper placement of the water temperature probe
- Adjustable temperature set points for flexibility
- Connecting the controller to a reliable chiller
- Protecting electronic components from water damage
- Regular calibration for consistent readings
How to Maintain and Care for Your DIY Cold Plunge Long-Term?
Keeping your cold plunge clean and running smoothly requires regular sanitation and system checks. Make sure to replace chlorine tablets every few weeks and perform deep cleanings to prevent buildup.
Periodic maintenance like filtering, sealing fittings, and covering your setup will keep it safe and efficient for long-term use.
Regular Sanitization Practices
Maintaining sanitary conditions in your DIY cold plunge is essential for safe and enjoyable use over time. To guarantee proper sanitization, regularly check chlorine tablets—about 3 g hot tub granules—or use 2-3 oz of 12% hydrogen peroxide to keep water clean while avoiding chemical reactions.
Replace the water periodically to prevent buildup and maintain clarity. Clean the entire tub every 2-3 weeks using a suitable cleaner and a sump pump to remove dirt, oils, and biofilm.
Use inexpensive water toys or hot tub cleaning tools to scrub particulates and grime from the cooler or tub floor. Regularly monitor sanitation levels by checking chlorine tablet status and water clarity to confirm consistently safe and effective cold plunge water.
Routine System Maintenance
To keep your DIY cold plunge functioning properly over time, regularly inspecting and servicing its key components is essential. Start by performing leak tests after any assembly or maintenance by filling the tub and checking for sealing issues, applying pipe thread sealant if needed.
Keep the water clean and safe by replacing the chlorine tablets every 2-3 weeks in the floater. Every three weeks, drain the water completely and thoroughly clean the tub with a sump pump and cleaning solution to remove dirt and biofilm buildup.
Check and clean or replace the water filter cartridge regularly to prevent clogs and protect the pump. Additionally, insulate lids with reflective foil and foam to minimize heat loss, and rotate ice or chilled water bottles every few days to maintain ideal water temperatures.
Troubleshooting Common Issues With Your DIY Ice Bath
When issues arise with your DIY ice bath, quick identification and targeted solutions can save you time and prevent costly damage. Leakage is common in conversions, often caused by improper waterproof sealing. Check all seams and connections, using pond liners and seam sealants like JB Weld Water Weld, and thoroughly test for leaks before full use.
Filter clogging reduces water flow and pump efficiency; regularly clean or replace filters such as the Culligan HF-360B every few months. In stock tank setups, insufficient insulation can lead to temperature instability and increased energy use, so add lids or insulating foam.
Poorly installed bulkhead fittings or sealed tubing can drip water; use generous pipe thread sealant and double hose clamps on all connections. Proper maintenance minimizes issues and prolongs your setup’s lifespan.
DIY vs. Commercial Cold Plunge: Which Is Right for You?
Choosing between building your own DIY ice bath or investing in a commercial cold plunge depends on your specific needs, budget, and how much effort you’re willing to put into maintenance.
DIY Ice setups cost under $1,000 using stock tanks or insulated coolers, making them affordable but requiring manual ice management and regular cleaning. They lack integrated filtration, meaning you’ll need to clean the water manually.
On the other hand, a commercial cold plunge offers features like built-in chillers, advanced filtration, and sanitation systems, making maintenance much easier and ensuring consistent temperature control. These units typically range from $2,800 to over $7,000.
If you prefer convenience and minimal upkeep, a commercial cold plunge suits you. But if customization and lower costs matter more, a DIY setup might be the better choice.
How to Winterize and Protect Your Ice Bath During Cold Months
As the cold months approach, it’s essential to take steps to winterize and protect your DIY ice bath so it functions properly and avoids damage.
Preparing your DIY ice bath for winter ensures optimal performance and prevents costly damage.
To insulate effectively, use foam insulation, reflective foil, or wrap the tub with a waterproof tarp to keep the water, ice, and water from freezing. Using a sturdy, well-fitting lid with insulation minimizes heat exchange and prevents debris entry.
Avoid draining the water completely; instead, keep it at 40-50°F by adding ice packs or replacing ice periodically.
Protect plumbing fittings and seals by insulating exposed pipe sections or adding removable plugs to prevent cracking.
Regularly check sanitizer levels to maintain water quality when water turnover slows, ensuring your ice bath remains safe and functional throughout winter.
Frequently Asked Questions
What Size Container Is Best for a DIY Ice Bath?
You should use a 100-gallon container for your DIY ice bath, as it offers a good balance of comfort, manageability, and enough space for full-body immersion. Larger sizes suit bigger or shared baths, while shallower ones target leg immersion.
Can Ice Baths Help With Lipedema?
Ice baths can help with lipedema by reducing inflammation, swelling, and fluid buildup. You might notice temporary relief in pain and improved circulation, but always consult your healthcare provider before trying cold therapy as part of your treatment plan.
What Do I Need for a DIY Cold Plunge?
You need a large, insulated container like a stock tank or freezer, a chiller or plenty of ice, a pump, water filter, lid, sealing materials, and basic plumbing parts. Regular maintenance and sanitation keep it clean and effective.
How to Arrange an Ice Bath at Home?
You arrange an ice bath at home by choosing a large, insulated container like a stock tank or chest freezer, filling it with water cooled to 45-55°F, then adding ice or a chiller, and ensuring proper drainage, insulation, and sanitation.