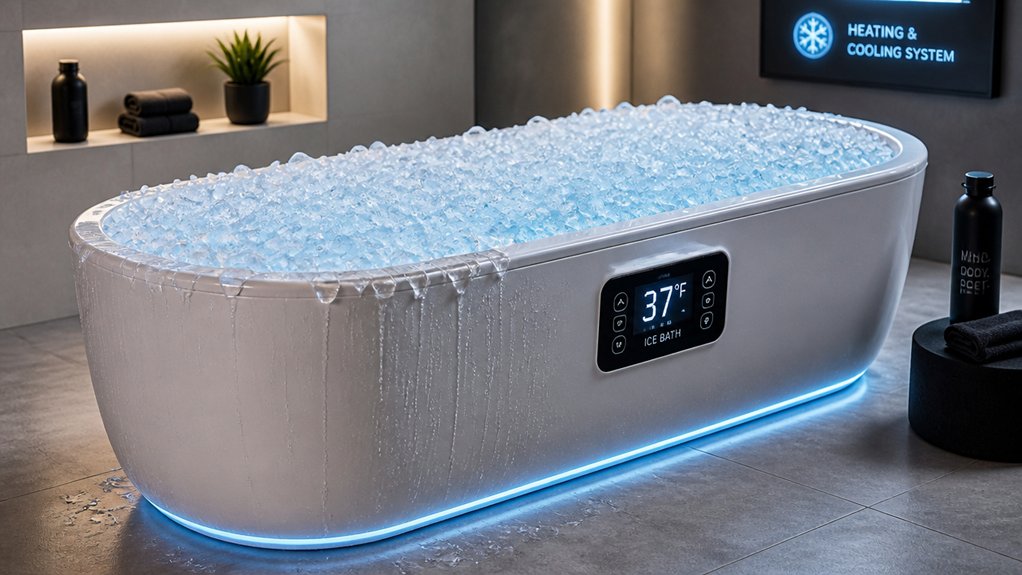
Converting your tub into an electric ice bath is a smart, affordable way to access professional-grade cold therapy at home. You’ll need a waterproof container, a high-capacity chiller, and proper waterproofing to prevent leaks. Set up the system with a circulation pump, filtration, and temperature control to keep water between 37-39°F. Regular maintenance, including water sanitization and insulation, guarantees safety and effectiveness. Keep your stability, safety, and comfort in mind as you tailor your cold plunge; further details await your exploration.
Why Convert Your Tub Into an Electric Ice Bath for Cold Therapy
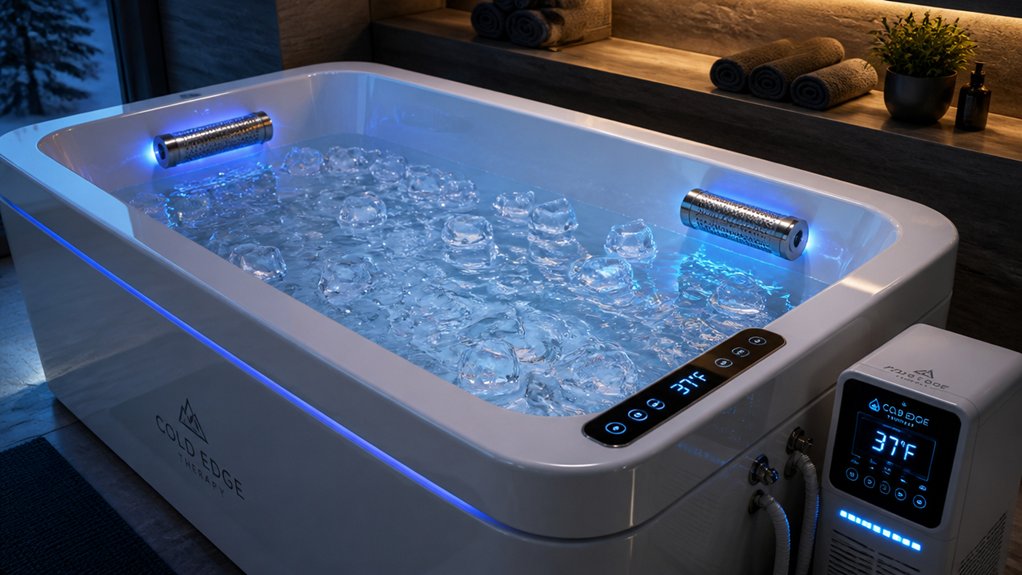
Have you ever wondered why so many people are converting their tubs into electric ice baths for cold therapy? A cold plunge system makes it simple to enjoy professional-grade cold therapy at a fraction of the cost.
Unlike traditional ice baths, which require daily ice purchases, this system cools water to 37-39°F within a few hours and keeps it at a precise temperature indefinitely. The integrated filtration, circulation, and ozone sanitization mean less water change and better hygiene, letting you refresh every 2-3 weeks.
Operating costs are low—about $25-30 monthly—and the setup takes under 5 minutes with no tools or permanent modifications. It’s a flexible, cost-effective way to reap the benefits of cold therapy without breaking the bank or damaging your tub. Incorporating high-powered chillers ensures rapid cooling and energy efficiency, making the process even more streamlined.
Choosing the Right Container for Your DIY Ice Bath
What’s the best container to turn into your DIY ice bath? An existing bathtub works perfectly since it’s already waterproof and designed to hold water, making it an easy conversion without plumbing modifications.
An existing bathtub is ideal—waterproof, built to hold water, and ready for quick DIY conversion.
If you want something more portable or space-efficient, a large storage bin, stock tank, or even a barrel can work well, especially if they’ve a drain or plumbing port for easy water changes.
Chest freezers are also popular, ranging from 280 to 400 liters, offering consistent temperature control with a suitable temperature controller. They’re cost-effective and can double as storage when not used for ice baths.
Consider your space, mobility needs, and maintenance preferences when choosing; these factors help determine the best container for your DIY setup. Additionally, selecting a container with suitable thermal insulation can help maintain desired temperature levels longer during use.
Selecting an Efficient Chiller Unit for Your Indoor Tub
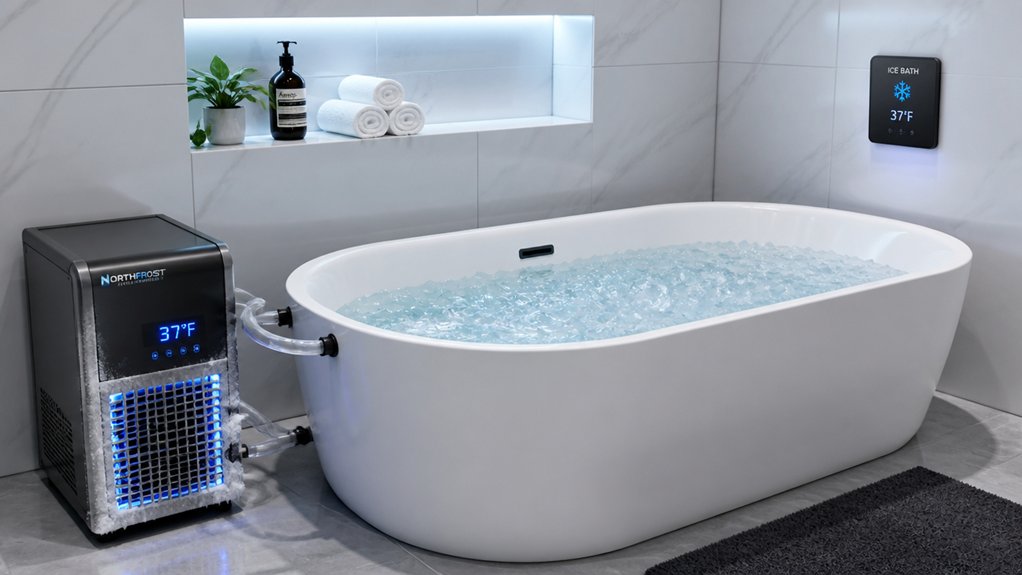
To keep your indoor ice bath at a consistent, therapeutic temperature, selecting the right chiller unit is key. Look for a chiller unit with a cooling capacity suitable for your tub size, typically drawing 500-800 watts—similar to a small window air conditioner—to guarantee effective temperature control. Choose a device that maintains precise temperature ranges from 37°F to 55°F, with a ±1°F accuracy, to deliver consistent cold exposure and maximize therapy benefits. Make certain it’s designed for indoor use, with proper airflow and stable placement to prevent overheating and prolong lifespan. Opt for a chiller with integrated circulation pumps and filtration compatibility to promote even cooling and maintain water hygiene effortlessly. Ensure the chiller features reliable filtration systems that help keep water clean and reduce maintenance. Finally, select units with simple temperature controls and weatherproof electrical components placed at least 3 meters from the tub for safety.
How to Properly Seal and Waterproof Your Cold Plunge Setup
To keep your cold plunge leak-free, use high-quality waterproof silicone sealant to secure all cracks, joints, and fittings. Make sure the sealant fully cures for 24-48 hours before filling the tub to guarantee a reliable, watertight barrier. A durable sealant should also provide flexibility and durability to accommodate temperature shifts and movement in the setup. Regularly inspect and touch up sealed areas, especially around drain holes and fittings, to maintain waterproof integrity over time.
Securing Waterproof Seals
Guaranteeing your cold plunge remains leak-free depends on properly sealing all relevant joints, cracks, and fittings. To do this, use a high-quality waterproof sealant to prevent water leaks and protect your setup. Apply generous amounts around drainage holes, fittings, and hose connections to create a watertight barrier. Allow the silicone sealant to fully cure as per manufacturer instructions, usually 24-48 hours, before filling the tub. Regularly inspect and maintain the waterproof seals every few months, reapplying sealant as needed to prevent leaks and water damage. Avoid abrasive cleaners or tools on sealed areas to preserve the waterproof barrier. Incorporating water-resistant materials like laminated coatings and PU fabrics can further enhance your sealing and prevent water ingress. Proper sealing is essential to guarantee long-lasting protection and a watertight, leak-free ice bath.
Choosing Durable Materials
Choosing the right materials is essential for creating a durable, leak-proof cold plunge setup. Select surfaces like porcelain, acrylic, or fiberglass that don’t require modifications but benefit from protective sealing to extend their lifespan.
Use waterproof silicone sealant to seal internal cracks and edges within tubs or freezers—allow ample curing time to guarantee a watertight seal and prevent leaks. Pay special attention to drainage plugs or bungs, making sure they fit tightly, then seal around them to avoid water seepage during use or cleaning.
Always waterproof electrical connections, and keep your chiller and pump units at least three meters away from water sources, using weatherproof switches for safety. Regular inspections and reapplication of silicone sealant keep your setup sealed, durable, and leak-free. Incorporating insulation materials ensures your setup maintains consistent temperatures and prevents heat loss over time.
Setting Up the Temperature Control System for Precise Cooling
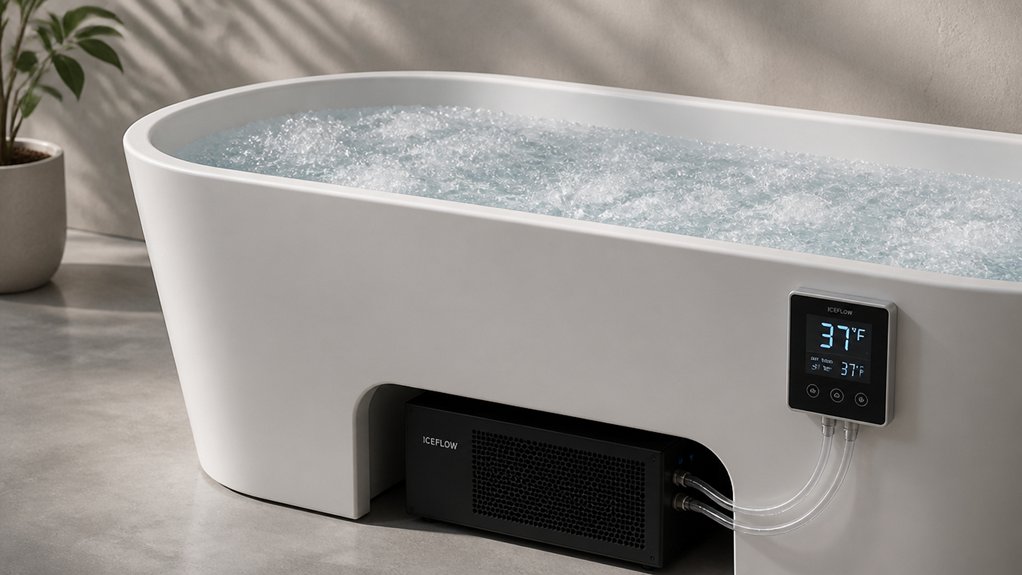
Setting up the temperature control system requires careful integration of your chiller unit’s built-in controller to achieve precise cooling. To guarantee consistent cold immersion, set the target temperature within 37-55°F (2-13°C). Allow 3-5 hours for initial cooldown from tap water (~70°F) to your desired setpoint near 39°F (4°C). Keep the water level at 60–70% to support effective circulation and temperature stability. Position the chiller outside the tub, connecting it via hoses, and keep electrical components at least 3 meters away from water for safety. Maintain good airflow around the chiller for peak efficiency. Regularly monitor the digital display or smartphone app, and adjust settings as needed to keep the water temperature within ±1°F for a perfect cold plunge experience. Additionally, choosing a reusable filter can help maintain water clarity and reduce maintenance frequency.
Connecting the Circulation Pump and Filtration for Water Quality
Connecting the circulation pump and filtration system is straightforward and essential for maintaining water quality in your ice bath. You’ll hook hoses securely between the chiller unit, pump, and tub, with no need for tub modifications. The circulation pump guarantees even water movement, providing consistent temperature distribution. The filtration system removes impurities, keeping the water clear and hygienic, and reducing biofilm buildup. Regular backwashing—daily to weekly depending on use—is key to keeping your system efficient. When combined with ozone sanitization, your water can stay fresh for 2–3 weeks, minimizing water changes. Use the table below to help visualize the connections:
| Component | Hose Connection | Purpose |
|---|---|---|
| Chiller unit | To pump | Circulates cold water |
| Pump | To filtration | Moves water through filter |
| Filtration system | To tub | Cleans and maintains clarity |
| Pump | To tub | Distributes cooled water |
| Regenerative backwash | Water outlet | Maintains filtration efficiency |
Additionally, selecting filters that align with the filtration type and micron rating ensures optimal water clarity and flow.
Step-by-Step Guide to Filling and Cold-Starting Your Ice Bath
Start by preparing your setup and filling the tub to about 60-70% capacity for proper circulation.
Turn on your chiller, select the “Chill❄” mode, and set the temperature between 37-39°F (2-4°C); then, allow the water to cool over 3-5 hours.
Once the water reaches the target temperature, verify that the filtration and ozone systems are running smoothly before starting your session.
Prepare Your Setup
Before filling your bathtub for the ice bath, make certain the tub is clean and free of any debris.
Next, set up your electric chiller system outside the tub. Guarantee it’s connected securely and in an accessible spot. Use the following steps:
- Fill the tub to 60–70% capacity for proper water flow and efficient cooling.
- Power on the chiller unit and select “Chill” mode.
- Set your water temperature between 37°F and 39°F for peak benefits.
- Allow 3–5 hours for the water temperature to drop from tap temperature (~70°F) to the target range.
Validate steady water circulation, confirm filtration’s working, and ensure the ozone sanitization system is active.
Regularly monitor water temperature using the chiller display or a thermometer.
Fill With Water
Filling your bathtub correctly sets the foundation for an effective ice bath, so start by ensuring the tub is clean and free of debris. Fill it to about 60–70% capacity with tap water, which allows proper flow through the chiller’s pump and filtration system during cold-start.
Use water at room temperature, around 70°F, for peak chilling efficiency, giving the system time to drop the water temperature to your target range of 37–39°F within 3–5 hours. Be careful not to overfill beyond the recommended level to prevent pump strain and maintain consistent circulation.
Regularly monitor the water level to stay within the specified range, ensuring the filtration system functions properly and avoiding airlocks that could interfere with the chilling process.
Cool Down Process
Once the bathtub is filled to about 60–70% capacity, power on your chiller unit and set the target temperature between 37°F and 39°F for ideal cold plunge results. Confirm your power supply is stable to avoid interruptions during cooling.
Watch the temperature closely using the chiller controls or a suspended thermometer, aiming for consistent cold water. It takes about 3 to 5 hours for the initial cooldown, dropping the water from roughly 70°F to the desired icy range.
To optimize the process:
- Place the chiller on a stable, level surface with unobstructed airflow
- Keep the electrical components at least 3 meters away from the bath
- Check temperature regularly to prevent overcooling
- Guarantee proper circulation for even water cooling
This guarantees a safe, effective cold water experience.
Maintaining Temperature Stability and Water Hygiene Over Time
Maintaining consistent temperature and water hygiene over time is essential to guarantee safe and effective cold plunge sessions. Proper temperature control guarantees your water stays within the ideal range—typically between 37-55°F—without frequent manual adjustments.
Chiller units automate this process by cycling on and off efficiently at 500-800 watts, stabilizing the water temperature during long immersions. Ozone sanitization plays a vital role in keeping your water clean, preventing bacteria growth without chemicals, and allowing you to go 2-3 weeks between water changes.
Regular backwashing and filtration further maintain water clarity by removing debris and contaminants. Together, these systems reduce maintenance, save water, and ensure your ice bath remains hygienic and consistently cold for safe, effective use over time.
Safety Tips and Troubleshooting Common DIY Cold Plunge Issues
To keep your DIY cold plunge safe, make sure electrical components are at least 3 meters away from the tub and use weatherproof switches with GFCI protection.
Regularly check water temperature with a reliable controller to avoid overcooling, and keep the area clean to prevent mold growth.
Address common issues like poor cooling by inspecting pump flow, airflow, and plumbing connections for leaks or blockages.
Electrical Safety Precautions
Guaranteeing electrical safety is essential when converting your tub into an electric ice bath, especially in moist environments. To protect yourself and your equipment, always use a weatherproof, ground-fault circuit interrupter (GFCI) outlet or breaker.
Keep electrical components at least 3 meters away from the tub to prevent water contact with live wiring and allow proper airflow around the chiller unit.
Use weatherproof switches rated for damp or outdoor use, and make sure all wiring complies with local electrical codes or is installed by a qualified electrician.
- Use GFCI outlets or breakers for safety
- Keep electrical components 3 meters from the tub
- Avoid adjusting valves or electrical connections when the pump runs
- Guarantee wiring is weatherproof and correctly installed
Water Temperature Monitoring
Wondering how to keep your DIY ice bath safe and effective? Regularly monitor the water temperature with a reliable thermometer to guarantee it stays within the safe range of 37-55°F ±1°F. Maintaining correct temperature is essential to avoid discomfort or health risks like cold shock or hypothermia.
Using integrated temperature controllers or external devices, such as WiFi-enabled controllers like INKBIRD ITC-308-WIFI, allows for precise monitoring and automated regulation, helping you maintain consistent cold plunge conditions.
Be aware of fluctuations caused by ambient conditions or cooling system issues. Regularly inspect your chiller or cooling setup for problems like clogged filters or faulty sensors, which can lead to inaccurate temperature readings.
Always allow 3-5 hours for cooling and verify the temperature before use for peak safety.
Preventing Mold Growth
Mold growth can quickly become a serious issue in your DIY ice bath if you don’t take proper precautions. To prevent mold buildup, use integrated ozone sanitization, which keeps water fresh for 2-3 weeks without chemicals.
Regularly perform backwashing and filter cleaning every 3-6 months to stop mold growth in circulation and filtration components. Keep an eye out for water discoloration or strange odors, as these signs indicate microbial or mold issues requiring immediate attention.
Additionally, make certain all electrical components stay dry and well-ventilated to avoid moisture-related mold around chillers and controls.
- Clean and replace filters routinely
- Flush water every 6-8 weeks
- Monitor water for color and odor
- Maintain dry, ventilated electrical parts
Enhancing Your Cold Therapy Routine With Tips for Optimal Use
To get the most out of your cold therapy, focus on optimizing your immersion technique and routine. Start with an Ice Bath lasting 2-3 minutes, three times a week, gradually increasing to 5-10 minutes as your cold exposure tolerance improves.
Keep the water temperature between 50-59°F for beginners, and aim for 39-45°F if you’re more advanced to maximize recovery and metabolic benefits. Use controlled breathing techniques—like deep, 4-second inhales and exhales—to calm your shock response and prolong your session comfortably.
For enhanced recovery, try combining your cold plunge with heat therapy. Regularly backwash and sanitize your water to stay fresh for 2–3 weeks, minimizing maintenance and ensuring a safe, effective cold therapy routine.
Frequently Asked Questions
How Do I Turn My Bathtub Into an Ice Bath?
You connect a cold plunge chiller to your tub with hoses, fill it 60-70% full, turn on the chiller, and wait 3-5 hours for it to reach 37-39°F. Adjust temperature and duration based on your comfort.
Can Ice Baths Help With Lipedema?
Yes, ice baths can help with lipedema by reducing inflammation, swelling, pain, and fluid retention. They also boost mood and relieve discomfort when used safely, but always combine them with professional medical care for best results.
Is an Ice Bath Good for Diabetics?
Yes, ice baths can benefit diabetics by improving insulin sensitivity, boosting metabolism, and enhancing mood. However, you should start with short sessions, monitor your body’s responses, and consult your healthcare provider to guarantee safety for your specific condition.
Does Cold Plunge Help With Cortisol?
Yes, cold plunges reduce cortisol by activating the parasympathetic nervous system, promoting relaxation, improving hormonal balance, and decreasing stress. Regular cold immersion, about 2-3 minutes, helps improve stress resilience and overall mental health.