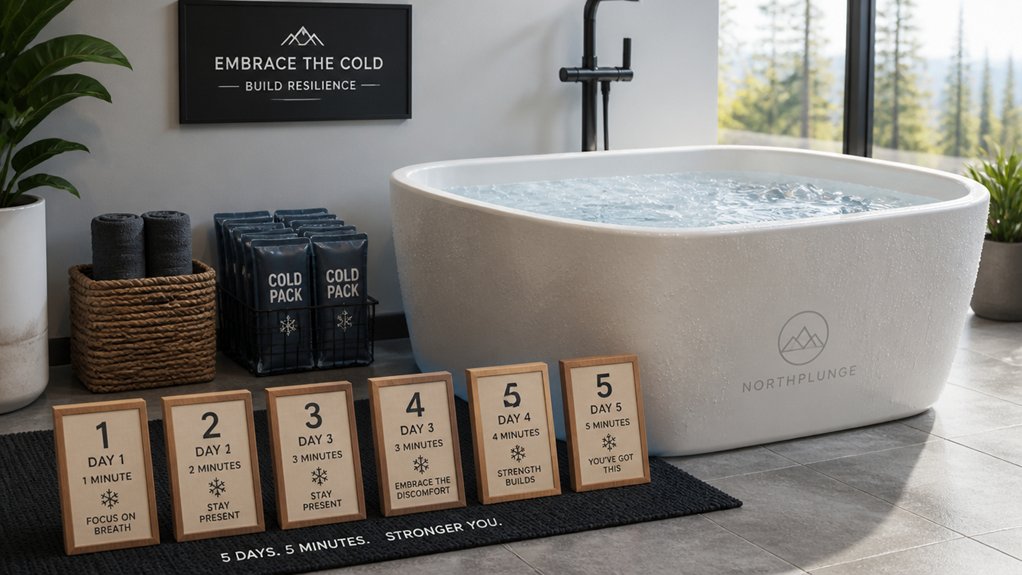
Start by evaluating your cold tolerance with brief dips at around 15°C, ensuring you’re comfortable and symptom-free. Gradually reduce water temperature each week, increasing immersion time cautiously. Follow a 5-step schedule: gentle introduction, gradual cooling, longer sessions, deeper submersion, and sustained exposure. Monitor signs of overdoing it like numbness or dizziness and pause if needed. Finish with proper warming routines. Stick with the plan and stay consistent; you’ll find everything you need to progress safely if you continue exploring further.
How Do You Know If You’re Ready for Weekly Ice Bath Acclimation?

Wondering if you’re ready to start weekly ice bath acclimation? You know you’re prepared if you can stay calm and perform controlled breathing for at least 2 minutes at around 15°C (59°F).
Signs of readiness include a reduced cold shock response after 3-4 water immersion sessions, such as less gasping and muscle tension. If you’ve maintained a consistent practice of 2-3 sessions weekly without dizziness or excessive shivering, you’re on the right track.
Being able to remain submerged up to your chest for 2-3 minutes at 10-15°C with manageable discomfort also indicates progress. Most importantly, feeling mentally prepared and physically stable, confirmed by a healthcare professional, guarantees safe, effective weekly cold water immersion and robust mental resilience. Additionally, regularly monitoring your water quality and maintaining proper water care helps ensure a safe and hygienic experience water treatment.
How to Assess Your Current Cold Tolerance and Experience
To assess your cold tolerance, start by timing how long you can stay in water around 15°C (59°F) without excessive shivering or breathlessness.
Pay attention to your heart rate, breathing, and feelings of numbness or dizziness during and afterward to understand your body’s response.
Keep track of your prior cold exposure experiences to see how they’ve influenced your current resilience.
Additionally, consider evaluating your temperature control capabilities to better understand how your body manages varying cold conditions.
Current Cold Tolerance Level
Evaluating your current cold tolerance involves paying close attention to how long you can comfortably stay immersed in water at around 15°C (59°F) without shivering excessively or feeling distressed.
Your cold tolerance is reflected in how well you handle immersion duration, breath control, and physical reactions like shivering onset. As you progress through acclimation, you should notice improvements in your ability to extend immersion times and maintain calmness despite perceived cold shock.
Monitoring signs such as skin color, comfort level, and recovery speed post-immersion helps gauge your adaptation levels. Overall, your cold tolerance reflects your body’s response to cold exposure and indicates whether you’re building resilience or need further acclimation.
Tracking these indicators guarantees safe and effective cold exposure progress.
Prior Cold Exposure Experience
Understanding your prior cold exposure experiences provides valuable insight into your current cold tolerance. Reflect on any cold showers, winter swimming, or ice baths you’ve undertaken, noting the frequency, duration, and water temperatures used.
These experiences shape your physiological responses, such as heart rate changes, shivering, or cold shock symptoms like gasping or dizziness. Pay attention to how your body reacts during these exposures to gauge your level of acclimation.
Monitoring your body’s response to cold stress and how well you recover afterwards can further inform your preparedness for longer or colder immersions.
If you’ve used controlled breathing techniques, you may find it easier to manage breathlessness and cold shock reactions, indicating better preparedness for cold-water immersion. Tracking your comfort level and recovery times also helps assess your cold tolerance, guiding safe progression in your weekly ice bath schedule.
How to Plan Your Weekly Progression Step-by-Step
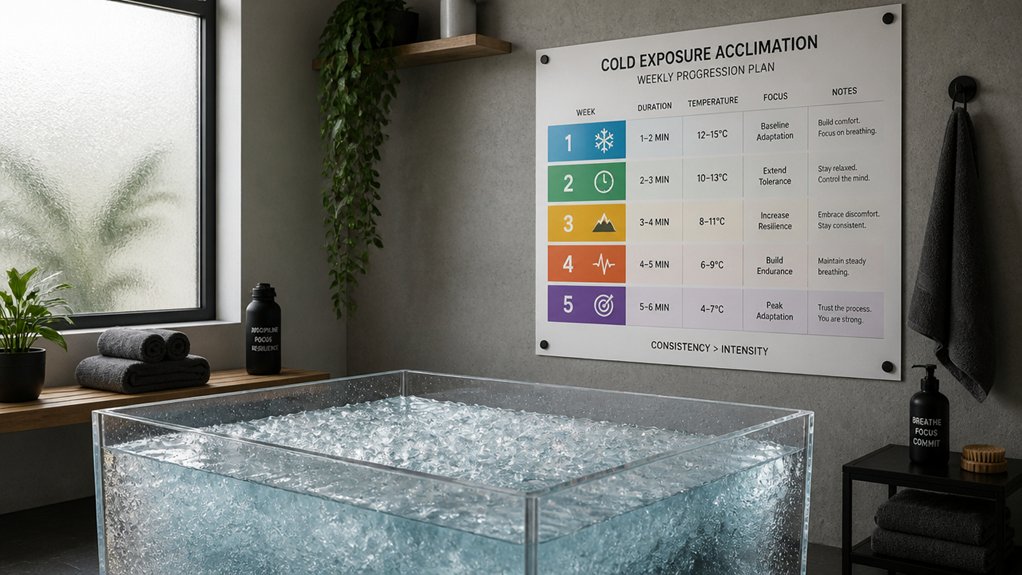
To safely progress through your ice baths, focus on gradually lowering the temperature and increasing your immersion time each week. Start at a comfortable level and only extend duration as your body adapts, avoiding sudden jumps. This steady approach helps build tolerance while minimizing the risk of cold shock or overstressing your system. Incorporating insulation efficiency into your setup can also help maintain consistent temperatures, making your weekly progression smoother and more effective.
Gradual Temperature Reduction
Starting your ice bath progression gradually guarantees your body adapts safely to colder temperatures while maximizing benefits. Begin with water around 15°C (59°F) for 1-2 minutes, focusing on controlled breathing and gradual immersion.
Each week, decrease the temperature slightly—Week 2, 12-14°C (54-57°F)—and increase your sessions to 2-3 minutes, allowing your body to adjust without cold shock.
By Week 3, reduce temperature further to 10-12°C (50-54°F), extending immersion to 3-4 minutes to deepen cold exposure benefits safely.
In Week 4, aim for 8-10°C (46-50°F) at 4-5 minutes, as cold shock responses diminish. Monitor your signals closely and never exceed the minutes in Celsius to avoid hypothermia, ensuring gradual adaptation. Effective water treatment can help maintain water clarity and hygiene during your cold plunge routine.
Increasing Immersion Duration
Building on your efforts to gradually lower water temperature, steadily increasing immersion duration helps your body adapt more effectively. A proper temperature range and insulation help retain cold, reducing discomfort during longer sessions. Start the week with 1-2 minutes at 15°C (59°F), focusing on controlled breathing for safe cold exposure. Each week, extend your immersion by 30 seconds to a minute, gradually progressing toward 3-5 minutes as water temperature drops to 10-12°C (50-54°F). Keep immersion depth up to chest level to guarantee consistent physiological benefits and easier tolerance. Use temperature control or adjust the ice-to-water ratio to maintain the ideal range. Always monitor your bodily responses and adhere to the rule of not exceeding the water temperature in °C when setting maximum time—like 10 minutes at 10°C—to prevent hypothermia. Incorporating insulation materials such as multi-layer covers can help maintain consistent water temperature as you extend your immersion time.
What Water Temperatures Should You Use During Each Phase?
During each phase of your ice bath routine, selecting the right water temperature is essential for safe and effective progress. Your first ice bath should use water around 60-65°F (15-18°C) to ease cold exposure and build tolerance.
As you advance, drop the temperature to 55-60°F (13-16°C) during weeks 3-4, when your body adapts and comfort improves.
By weeks 5-6, aim for 50-55°F (10-13°C) to maximize recovery benefits with 3-4 minute full-body immersion.
For more experienced phases, use 45-50°F (7-10°C), depending on your goals.
Maintaining your temperature within the recommended range efficient cooling ensures optimal physiological responses while safeguarding your well-being.
Consistency matters, so maintaining a target temperature within 50-59°F (10-15°C) guarantees peak vasoconstriction, hormonal response, and safety during your cold plunge sessions.
How Long Should You Stay in the Ice Bath and How Deep Should You Submerge?
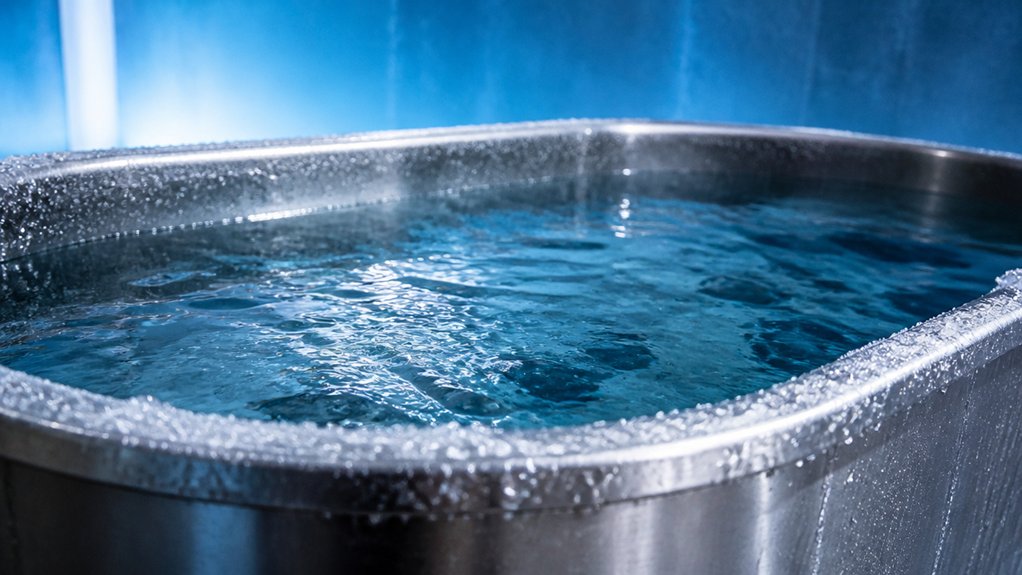
How long you should stay in the ice bath and how deep you should submerge depend on your experience level and comfort.
For beginners, start with 1-2 minutes of full-body immersion at around 15°C (59°F). As your tolerance builds, gradually increase immersion time, aiming for 10-15 minutes at temperatures of 10-15°C for more experienced users.
Start with 1-2 minutes at 15°C, gradually increasing to 10-15 minutes at cooler temperatures as tolerated.
Always guarantee the submerge depth covers at least the lower body to the waist initially, progressing to chest level as comfort improves.
Safety is key—avoid hypothermia by not exceeding recommended durations, especially at colder temperatures below 10°C, where shorter sessions of 1-5 minutes are advised. Listen to your body, and increase duration carefully to build tolerance safely. Incorporating a proper thermometer can help ensure accurate water temperatures and maintain safety during your cold plunge routine.
Which Breathing Techniques Can Help You Tolerate Cold Better?
What breathing techniques can help you tolerate cold better? Controlled breathing techniques like box breathing (inhale 4 counts, hold 4, exhale 4, hold 4) calm your nervous system and reduce the cold shock response during cold exposure.
Extended exhale breathing—inhale 4 counts through your nose, exhale 6-8 counts through your mouth—activates the parasympathetic nervous system, easing discomfort and increasing immersion tolerance.
Starting a breath control pattern before entering the ice bath helps prevent hyperventilation and panic. Maintaining this steady rhythm during immersion reinforces mental focus and stabilizes oxygen levels.
Practicing these techniques over multiple sessions gradually weakens the involuntary cold shock response, boosting your cold tolerance within a couple of weeks.
Avoid breath holding underwater, and focus on slow, rhythmic breathing.
How Can You Monitor Your Body’s Response and Adjust the Routine?
To effectively monitor your body’s response, pay attention to how your cold shock feels and aim for a 30-50% reduction over four weeks to show your adaptation.
Keep track of your breathing rate, especially during and after immersion, targeting fewer than five breaths per minute by week six.
Use energy, mental clarity, and sleep quality ratings to fine-tune your routine and guarantee you’re recovering well without overexposure.
Monitoring Physical Reactions
Monitoring your body’s response during ice baths is essential to guarantee safety and optimize benefits. Track symptoms like shivering, rapid breathing, and dizziness, aiming for a 30-50% reduction within four weeks as signs of adaptation.
Keep an eye on your breathing, trying to monitor breathing and aim for fewer than five breath cycles per minute by week 6, which indicates an improved parasympathetic response.
Record your post-plunge energy levels about an hour after sessions, with consistent ratings of 7 or higher out of 10 showing effective recovery benefits. Observe changes in mood and mental clarity four hours after immersion to assess neurochemical gains.
Additionally, monitor sleep quality and onset times, especially if you do evening baths, to fine-tune timing for better rest.
Adjusting Based on Tolerance
Adjusting your ice bath routine based on how your body responds guarantees safe and effective progress. Track your weekly per week sessions, noting changes in immersion time and cold temperatures to improve tolerance gradually.
Monitor physical signs like shivering, rapid breathing, or discomfort, aiming for a 30-50% decrease within four weeks. Keep an eye on your mental health benefits, such as mood enhancement, by rating your post-plunge energy levels around 7+ out of 10.
Use a journal to log water temperature and responses, adjusting session duration or cold water therapy intensity accordingly. Watch for signs of overexposure, like numbness or fatigue, and modify your routine.
This personalized approach helps your body adapt safely to cold temperatures while maximizing benefits.
What Are the Signs You’re Overdoing It? When Should You Pause?
Ever wonder how to tell if you’re pushing your ice bath routine too far? Signs of overtraining include excessive fatigue, persistent muscle soreness, and an elevated resting heart rate. If these occur, it’s time to take rest days and pause.
Cold stress overload manifests as numbness beyond normal cold sensations, lingering shivering, and difficulty warming up afterward.
Notice mood disturbances like irritability, anxiety, or loss of motivation—they indicate you’re overdoing it.
Dizziness, headaches, tingling, or faintness during or after immersions point to an excessive cold shock response, requiring immediate cessation.
Additionally, if your heart rate variability stays low and you feel like recovery is poor, it’s a clear signal to reduce frequency, rest, and give your body time to reset before resuming.
What’s the Best Way to Warm Up Safely After Your Ice Bath?
After spending time in an ice bath, warming up the right way helps your body recover safely and effectively. You should warm up gradually by drying off quickly with a towel, then layering warm clothes or a blanket to avoid sudden chills.
Drinking a hot beverage can support rebound warming, helping to restore your body temperature safely without shocking your system. Perform light exercises like squats or jumping jacks post-plunge to gently increase circulation and generate internal heat.
Avoid hot showers immediately, as they can interfere with natural thermoregulation and reduce cold exposure benefits. Instead, focus on controlled, gradual warming to support safe recovery and allow your body’s natural thermoregulation to resume smoothly, decreasing the risk of cold-related injuries.
How Can You Stay Consistent and Make This Routine Work Long-Term?
Sticking to an ice bath routine consistently can be challenging, but establishing clear strategies makes it manageable. Set a weekly schedule with fixed morning sessions to create a habit and leverage natural cortisol peaks for better adherence.
Keep your schedule simple by establishing a minimum viable dose, like 90 seconds at 55°F (13°C), and follow the “never miss twice” rule to maintain momentum. Use progressive adaptation by gradually lowering water temperature and increasing duration over 4-6 weeks to reduce cold shock and boost comfort.
Pair your ice baths with controlled breathing techniques to manage discomfort and increase enjoyment, making it easier to stick with the routine. Tracking your progress through journaling or mood ratings can motivate you and confirm the benefits, helping you make this a sustainable long-term habit.
Tips to Track Your Progress and Keep Motivation High
Tracking your progress with specific metrics can greatly boost your motivation and help you stay committed to your routine.
Start by noting how you *track your subjective cold shock intensity*—aim to reduce it by 30-50% within four weeks as a clear progress indicator. Keep an eye on *breathing control*, endeavoring for fewer than five breath cycles per minute by week six. Record your *post-plunge energy level* about an hour after sessions, targeting a consistent 7+/10 to confirm effective dosing.
Journal your *mental clarity* and *mood changes*, comparing days with and without cold plunges to observe the *cumulative benefits*. Monitoring these factors helps you visualize progress and stay motivated to continue your weekly ice bath schedule.
Frequently Asked Questions
How Long to Ice Bath per Week?
You should aim for about 11 to 15 minutes of ice baths weekly, split into 2 to 4 sessions. Start with shorter durations, then gradually increase, focusing on consistency and safe immersion times to maximize benefits without risking hypothermia.
Do Cold Plunges Help Neuropathy?
Cold plunges may help neuropathy by reducing inflammation, enhancing circulation, and modulating pain perception through increased norepinephrine and dopamine. However, their effectiveness varies, so you should consult a healthcare professional before trying cold therapy for neuropathy.
How Many Times per Week Do Ice Plunges?
You should aim for 2-4 ice bath sessions weekly to benefit from acclimation and recovery. Beginners start with 1-2, gradually increasing to 3-4 as your tolerance builds, ensuring consistency without overdoing it.
Can Ice Baths Help With Lipedema?
Ice baths may help with lipedema by reducing swelling, alleviating pain, and improving circulation. They activate brown fat, promote lymphatic function, and decrease inflammation, which could support managing symptoms, especially when combined with other treatments like compression.